RDS migration Cross account.
How We Built an Automated, High-Speed Cross-Account RDS Disaster Recovery Pipeline with AWS Step Functions
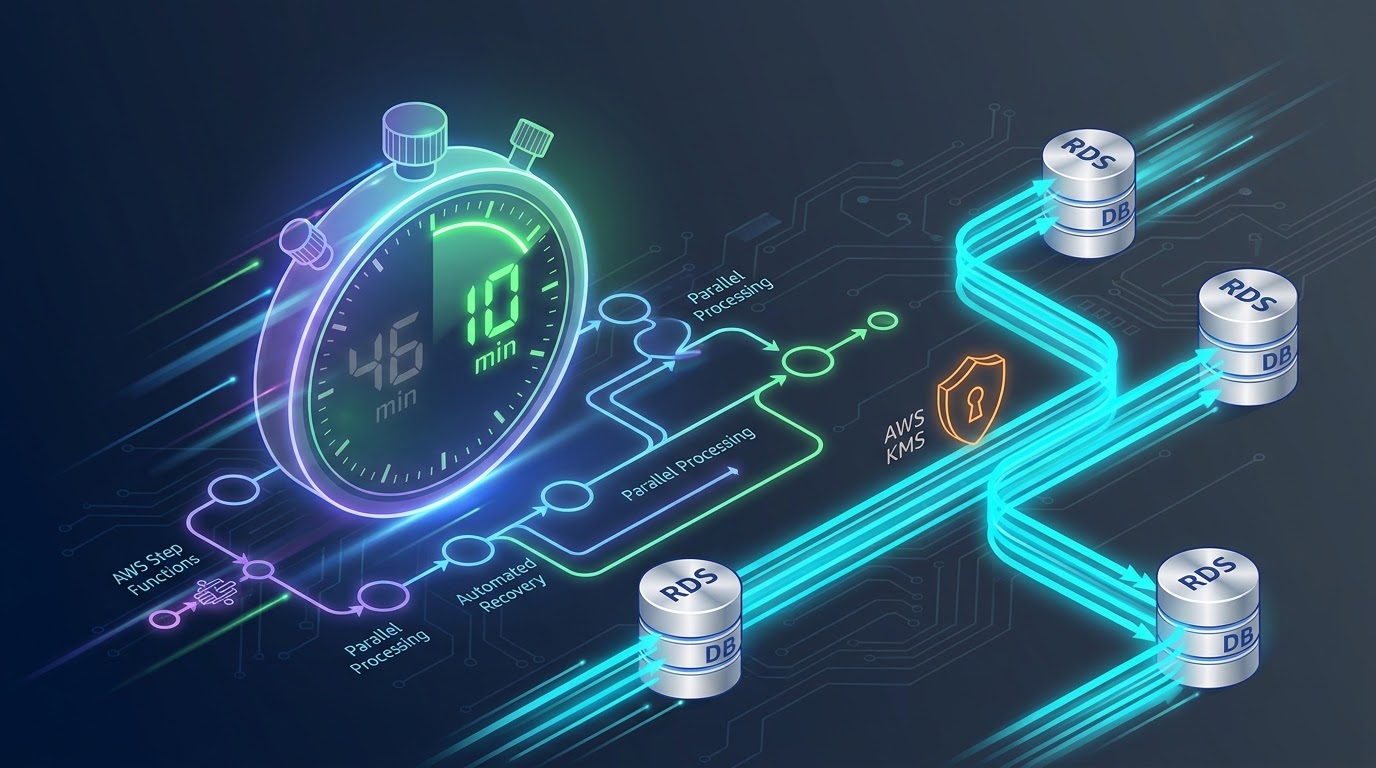
Reducing cross-account RDS disaster recovery replication time from 46 minutes to under 10 minutes using AWS Step Functions, Lambda, and intelligent optimization techniques.
Introduction
Disaster Recovery (DR) is no longer something organizations implement only to satisfy compliance requirements—it's a critical component of building resilient cloud infrastructure.
Whether you're preparing for regional failovers, protecting against ransomware, or planning production database migrations, your recovery strategy is only as good as your ability to restore data quickly and reliably.
For Amazon RDS workloads, creating backups is relatively straightforward. The real challenge begins when those backups need to be securely replicated across AWS accounts while keeping Recovery Time Objective (RTO) as low as possible.
During one of our production DR implementations, we encountered three major challenges:
- Securely sharing encrypted RDS snapshots across independent AWS accounts.
- Eliminating long execution times caused by sequential processing.
- Reducing database replication time to enable near-zero downtime production cutovers.
This article explains how we designed an automated cross-account RDS Disaster Recovery pipeline using AWS Step Functions, AWS Lambda, Amazon EventBridge, and AWS KMS—and how a few engineering optimizations reduced our total execution time by more than 75%.
The Challenge
Initially, our backup workflow was entirely sequential.
The pipeline would:
- Create a snapshot for Database A.
- Wait until the snapshot completed.
- Copy and re-encrypt it.
- Share it with the DR account.
- Repeat the entire process for Database B.
While this approach worked, it introduced a significant bottleneck.
For example:
DatabaseProcessing TimeCore Production DB~16 minutesMain Production DB~30 minutes
Because each database waited for the previous one to finish, the complete pipeline required approximately 46 minutes.
For disaster recovery scenarios and production cutovers, this delay was simply too long.
We needed a faster, fully automated solution.
Solution Architecture
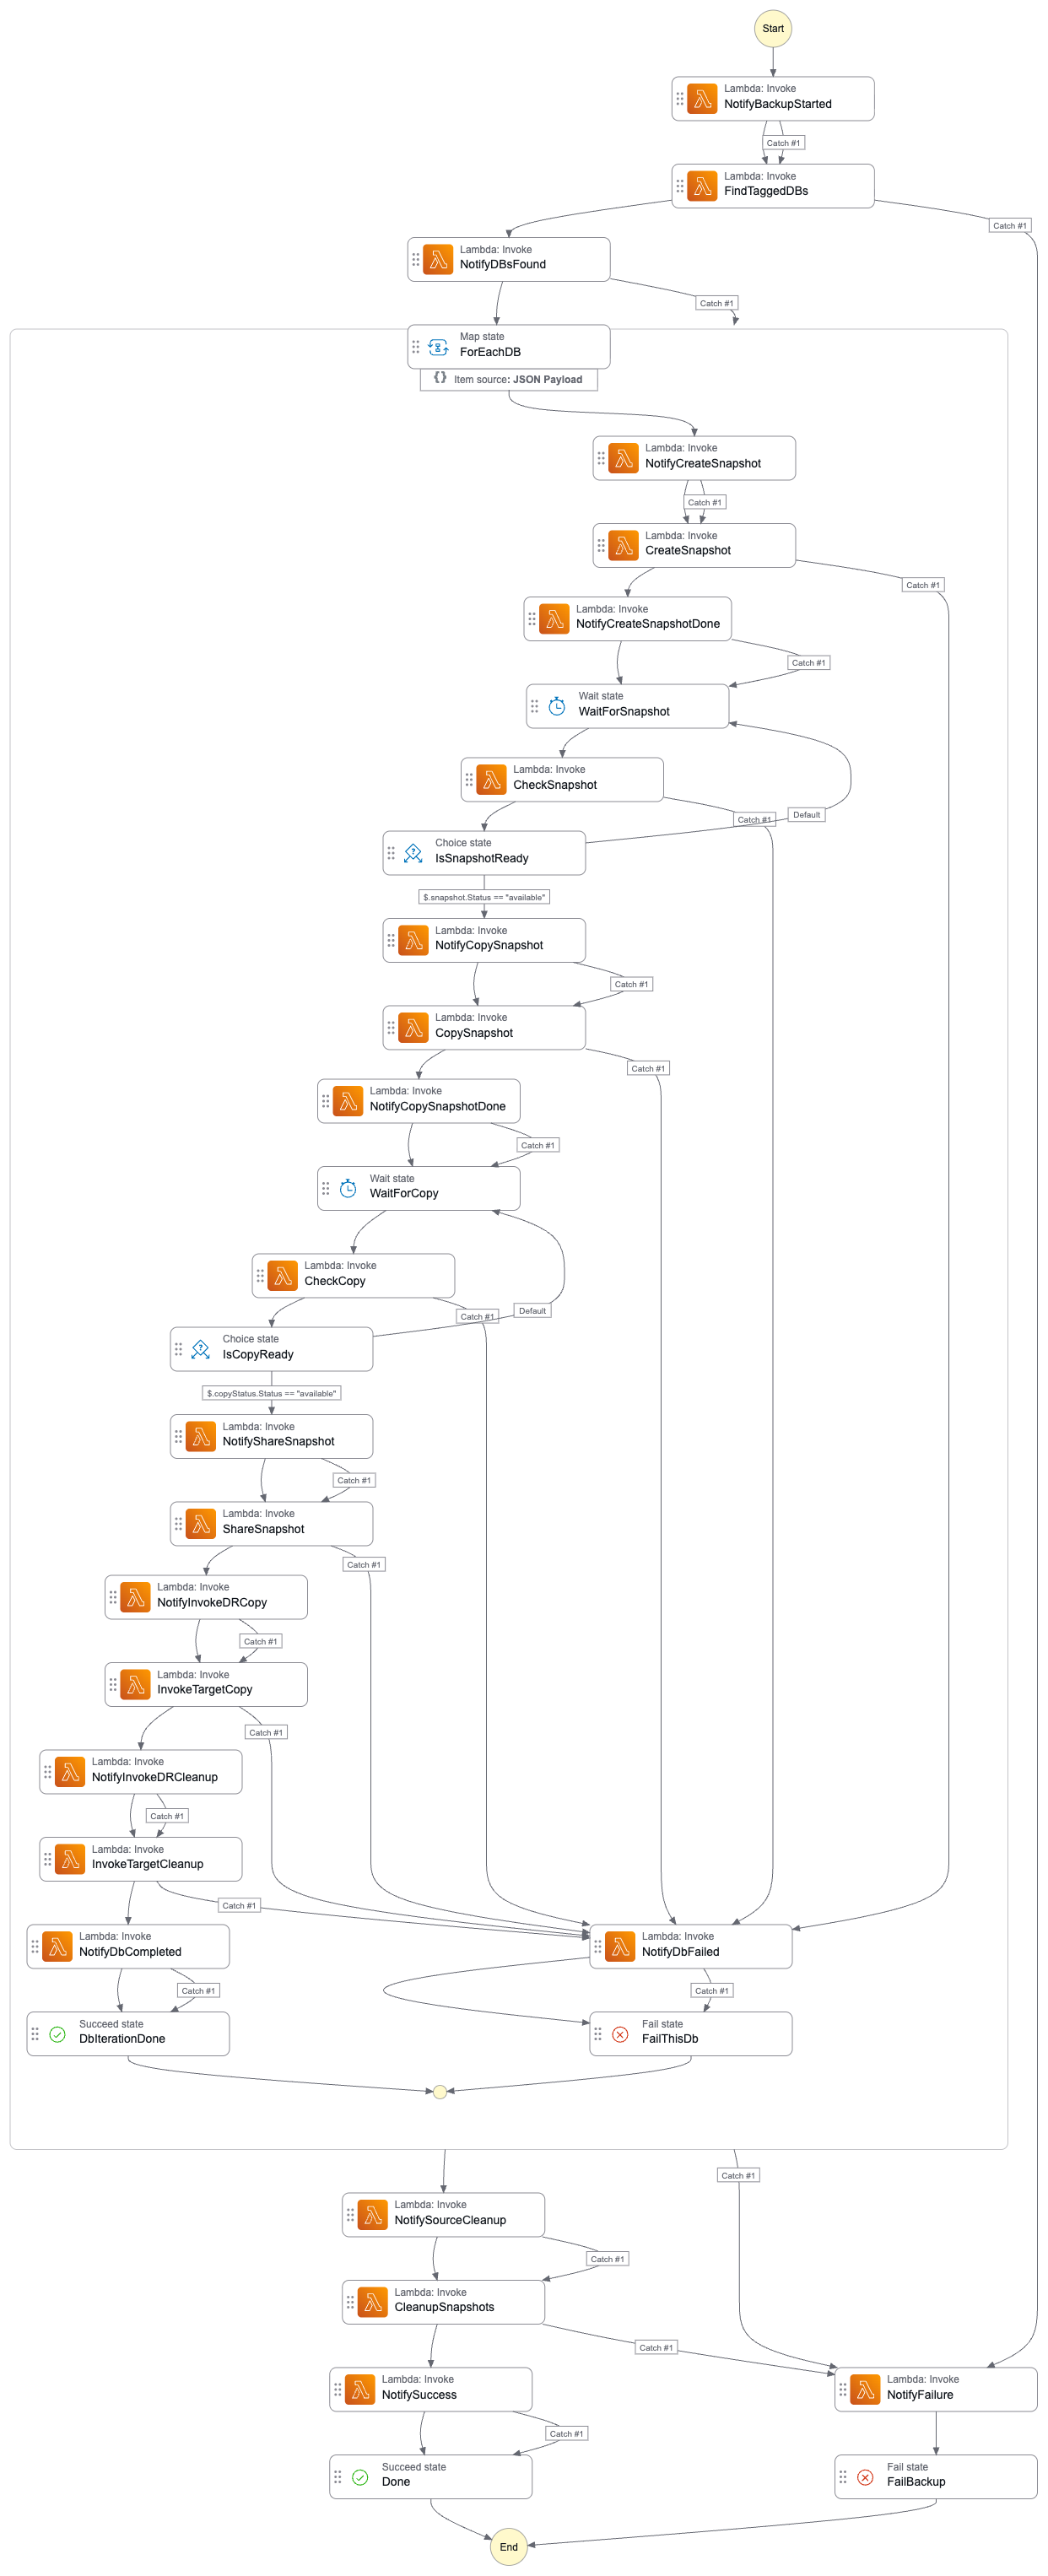
We designed a serverless orchestration workflow using AWS Step Functions as the central coordinator.
The architecture spans two completely isolated AWS accounts:
- Source Account
- Hosts production RDS databases.
- Creates and shares encrypted snapshots.
- DR Account
- Receives shared snapshots.
- Copies them using its own KMS key.
- Maintains disaster recovery backups.
                  [ SOURCE ACCOUNT ]                           [ DR ACCOUNT ]

  EventBridge Schedule
          │
          ▼
  AWS Step Functions
          │
     Parallel Map State
     (MaxConcurrency = 2)
          │
   ┌──────┴────────┐
   │               │
Database A     Database B
   │               │
Create Snapshot    Create Snapshot
   │               │
Re-encrypt         Re-encrypt
   │               │
Share Snapshot ─────────────────────────► Copy Snapshot
                                         using DR CMK
                                              │
                                        Retention Cleanup
Everything is fully automated and executes without manual intervention.
End-to-End Workflow
Let's walk through the complete execution flow.
Step 1 – Scheduled Execution
Every day, Amazon EventBridge triggers the Step Function automatically.
The workflow immediately sends a notification to the engineering team's chat platform (Slack or Zoho Cliq) indicating that the DR backup process has started.
This provides operational visibility before any database processing begins.
Step 2 – Automatic Database Discovery
Rather than maintaining a hardcoded list of databases, the workflow dynamically discovers eligible RDS instances.
A Lambda function scans all RDS instances and filters those tagged with:
CrossAccountBackup = Yes
If no databases are tagged, the workflow exits gracefully.
Otherwise, it returns a clean JSON array such as:
{
  "DBs": [
    "db-core-prod",
    "db-main-prod"
  ]
}
This makes onboarding new databases as simple as adding a tag.
Step 3 – Parallel Processing
The returned database list is passed into a Map State within AWS Step Functions.
Instead of processing databases one after another, the workflow processes multiple databases simultaneously.
Each database independently performs the following operations:
- Create manual snapshot
- Wait until snapshot completes
- Copy snapshot using a Customer Managed KMS Key
- Wait for copy completion
- Share snapshot with DR account
- Trigger DR account copy
- Clean up old snapshots
Because each RDS instance has independent storage, these operations do not compete for storage IOPS, making parallel execution highly efficient.
Step 4 – Cross-Account Snapshot Copy
AWS-managed encryption keys (aws/rds) cannot be shared across accounts.
To overcome this limitation:
- The original snapshot is copied locally.
- The copy is encrypted using a Customer Managed Key (CMK).
- Snapshot permissions are modified to grant access to the DR account.
- A cross-account Lambda function in the DR account copies the shared snapshot.
- The copied snapshot is encrypted again using the DR account's CMK.
This ensures secure encryption while maintaining complete account isolation.
Step 5 – Cleanup and Notifications
Once every database finishes processing:
- Temporary snapshots are deleted.
- Older snapshots exceeding the retention policy are removed.
- A completion notification is sent summarizing the execution.
The entire backup cycle finishes automatically without requiring any manual cleanup.
Three Optimizations That Made the Biggest Difference
While the architecture itself was important, most of the performance improvement came from three specific optimizations.
1. Parallel Processing with Step Functions
Originally, every database waited for the previous one to complete.
This meant:
Database A
      ↓
Database B
      ↓
Finish
The execution time became the sum of every database's processing time.
Instead, we configured the Map State with:
"MaxConcurrency": 2
This allowed both databases to execute simultaneously.
Database A ───────────────┐
                          ├── Finish
Database B ───────────────┘
Result
BeforeAfterSequential executionParallel execution~46 minutes~15 minutes
This single configuration reduced execution time by more than 65%.
2. Smarter Polling Intervals
AWS RDS snapshot creation is asynchronous.
The workflow periodically checks whether a snapshot has completed.
Initially, our polling interval looked like this:
Wait 5 minutes
↓
Check Status
↓
Wait 5 minutes
↓
Check Again
The problem was obvious.
Suppose AWS finished creating the snapshot in six minutes.
The workflow would not detect completion until the ten-minute mark.
Four minutes were wasted doing absolutely nothing.
To eliminate this idle time, we reduced the polling intervals.
Snapshot Creation
Before
Wait: 300 seconds
After
Wait: 60 seconds
Snapshot Copy
Before
Wait: 300 seconds
After
Wait: 30 seconds
Now the workflow detects completion almost immediately after AWS finishes the operation.
Result
This optimization alone saved approximately 6–8 minutes across the pipeline.
3. Preserving Incremental Snapshot Lineage
This optimization had perhaps the biggest long-term impact.
Many engineers assume every RDS snapshot copy transfers the full database.
That isn't how Amazon RDS works.
Internally, snapshots are incremental.
If the destination account already contains a recent snapshot of the same database, AWS transfers only the changed data blocks.
For example:
Initial Database Size
700 GB
Daily changes:
15 GB
Without previous snapshots:
Transfer Size = 700 GB
With previous snapshots retained:
Transfer Size ≈ 15 GB
To preserve this incremental chain, we retained the last 2–3 days of snapshots in the DR account.
Instead of repeatedly transferring hundreds of gigabytes, AWS typically transferred only changed blocks.
Result
Cross-account replication time dropped dramatically—from around an hour for full copies to approximately 5–10 minutes for incremental transfers.
Performance Comparison
The improvements were significant.
Pipeline StageLegacy WorkflowOptimized WorkflowCore Database Backup~16 minutes~16 minutesMain Database Backup~30 minutes~15 minutesPolling Delay~6–8 minutesMinimalCross-Account TransferFull CopyIncremental CopyTotal Pipeline Time~46 minutesUnder 10 minutesBenefits of the New Architecture
The final solution delivered several operational improvements beyond speed.
- Fully automated disaster recovery workflow
- Secure cross-account snapshot sharing
- Customer-managed KMS encryption
- Dynamic database discovery using tags
- Automatic snapshot cleanup
- Incremental snapshot optimization
- Parallel execution with AWS Step Functions
- Real-time operational notifications
- Significantly lower Recovery Time Objective (RTO)
Most importantly, engineering teams can now perform production database cutovers and disaster recovery drills with minimal downtime and far greater confidence.
Lessons Learned
A few small architectural decisions can have an enormous impact on disaster recovery performance.
The biggest improvements didn't come from introducing new AWS services—they came from understanding how existing services behave.
Running databases in parallel instead of sequentially, reducing unnecessary waiting between polling cycles, and preserving incremental snapshot history together transformed what was once a slow, 46-minute workflow into a fully automated pipeline that consistently completes in under 10 minutes.
Sometimes, performance isn't about adding more infrastructure—it's about removing unnecessary waiting.
Final Thoughts
Disaster Recovery is often viewed as an insurance policy that you hope never to use. However, when an outage occurs, every minute counts.
By combining AWS Step Functions, AWS Lambda, Amazon EventBridge, AWS KMS, and Amazon RDS, we built a scalable, production-ready disaster recovery pipeline that is secure, automated, and fast.
If you're managing multiple production databases across AWS accounts, these optimizations can significantly reduce backup windows, improve RTO, and simplify operational management.
The best part? Most of these improvements require only architectural refinements rather than additional infrastructure—making them relatively simple to implement while delivering substantial performance gains.
Have you implemented a similar cross-account disaster recovery strategy for Amazon RDS? I'd love to hear about your approach, the challenges you encountered, and the optimizations that made the biggest difference in your environment.